Samsung Omnia Lite noir - Orange - GT-B7300 - Manuels - Samsung
SAMSUNG sur FNAC.COM
- Revenir Ó l'accueil
Manuels Utilisateurs Samsung :
17,3" Sķrie 3 300E7A - NP300E7A-S01FR - Manuels
40", UE40D6500WXZF, sķrie 6, SMART TV, 3D, FULL HD, LED TV - UE40D6500VS - Manuels
CLX-3185FW Manuels
Galaxy Ace GT-S5830
Galaxy S II GT-I9100
Galaxy Tab 8.9 GT-P7310/M16
Galaxy Tab 10.1 GT-P7500/M16
Galaxy YGT-S5360
LE32C350 LE32C350D1W
LE40C630 LE40C630K1W
MM-C330D
MM-D330D
Micro-chaŅne, MM-D330DWXZF, sķrie 3 - MM-D330 - Manuels
N145Plus - NP-N145P - Manuels
N150 - NP-N150 - Manuels
RSH5UEPN
SGH-F490
Samsung Galaxy Ace noir - Open market - GT-S5830 - Manuels
Samsung Galaxy S II noir - Open market - Manuels
Samsung Galaxy S III - GT-I9300 - Manuels
Samsung Galaxy S noir - Open market - GT-I9000 - Manuels
Samsung Galaxy NoteGT-N7000
Samsung Galaxy SGT-I9000
Sķrie 3 300E7A - NP300E7A-S03FR - Manuels
T23A550 T23A550
UE40D6500ZF UE40D6500VS
UE55ES8000/ZF, Slim LED 55", SMART INTERACTION, 3D - UE55ES8000S - Manuels
Wave 575 GT-S5750E
Wave II GT-S8530
16/4ppm Imprimante laser couleur CLP-310 Manuels
16/4ppm Multifonction lasercouleur CLX-3170FN Manuels
16/4ppm Multifonction lasercouleur CLX-3185FW Manuels Samsung
16/4ppm Multifonction laser couleur CLX-3185 Manuels Samsung
samsung-Wave-II-noir-Open-market-GT-S8530-Manuels
Samsung-Wave-noir-Open-market-GT-S8500-Manuels
Samsung-Wave-M-noir-Open-market-GT-S7250-Manuels
Samsung-Wave-578-noir-Open-market-GT-S5780-Manuels
Samsung-Wave-533-noir-Open-market-GT-S5330-Manuels
Samsung-Wave-3-noir-Open-market-GT-S8600-Manuels
Samsung-Player-HD-noir-Open-market-GT-I8910-Manuels
Samsung-Player-Duo-noir-Open-market-SGH-D980-Manuels
Samsung-Player-Addict-noir-Open-market-SGH-I900-Manuels
Samsung-Omnia-W-noir-Open-market-GT-I8350-Manuels
PRODUITS SAMSUNG :
Belkin Chargeur Secteur pour Samsung Galaxy S
Belkin Coque pour Samsung Galaxy S3 - Noire Translucide
Belkin Etui cuir Verve Folio pour Samsung Galaxy S II
Belkin Etui Pouch pour Samsung Galaxy S3 - Noir
Belkin Kit de Charge Secteur + Automobile pour Samsung Galaxy S
Belkin Lot de 3 protections d'ķcran pour Samsung Galaxy S3
Belkin Lot de 3 protections d'ķcran pour Samsung Galaxy S3 - Anti-reflets
Belkin Lot de 3 protections d'ķcran Screen Guard pour Samsung Galaxy SII - Transparentes
Belkin Micro-Chargeur allume-cigares pour Samsung Galaxy S
Belkin Protection d'ķcran Screen Guard pour Samsung Galaxy SII - Confidentialitķ 360░
CŌble Omenex Plug & Phone pour Samsung
CŌble Omenex Plug & Phone pour Samsung
Coque semi-rigide glossy noire pour Samsung Galaxy S II
Dķclencheur sans Fil Hahnel combi TF pour Canon/Pentax/Samsung
Enceintes iLuv iSM524 noir pour Samsung Galaxy Tab
Etui-Brassard Belkin DualFit pour Samsung Galaxy S II
Etui Samsung CC9S70B noir
Fnac chargeur secteur POWY pour Samsung SGH-D800
G-Mobility Pack confort pour Samsung Galaxy SII i9100
Imprimante Samsung CLX-3185FN - Ethernet
Kensington Etui pliant pour Samsung Galaxy Tab
Le Tanneur Etui cuir Pouch pour Samsung Galaxy S11 I9100 - Noir
Lunettes 3D actives Samsung SSG-4100GB
Modelabs 2 protections ķcran pour Samsung Galaxy ACE S5830
Modelabs Lot de 2 protections d'ķcran One Touch pour Samsung Galaxy Y S5360 - Transparentes
Modelabs Lot de 2 protections d'ķcran pour Samsung Galaxy Note - Transparentes
Muvit Adaptateur Jack 3,5 mm pour Samsung (ancienne connectique)
Muvit Coque Ó rabat Agenda pour Samsung Galaxy Note - Noire
Muvit Coque Doodle Coeur pour Samsung i9000 Galaxy S
Muvit Coque Doodle Extraterrestres pour Samsung i9000 Galaxy S
Muvit Coque Doodle Rose pour Samsung i9000 Galaxy S
Muvit Coque silicone pour Samsung Galaxy Ace
Muvit Coque silicone pour Samsung Galaxy - Noire
Muvit Etui Clapet pour Samsung I9100 - Noir
Muvit Etui Slim Clapet pour Samsung Galaxy Note
Muvit Housse Minigel pour Samsung Galaxy - Noire
Muvit Lot de 2 protections d'ķcran pour Samsung nexus S - 1 Miroir/1 Secret
Muvit Lot de 2 protections d'ķcran pour Samsung S5830
Muvit Pack Accessoires pour Samsung S5830
Muvit Sticker Carbone pour Samsung I9100
Muvit Sticker Drapeau pour Samsung I9100 - I Love Ibiza
Muvit Sticker Drapeau pour Samsung I9100 - I Love London
Muvit Sticker Drapeau pour Samsung I9100 - I Love New-York
Muvit Sticker Drapeau pour Samsung I9100 - I Love Paris
Muvit Sticker Drapeau pour Samsung I9100 - I Love Tokyo
Muvit Sticker Drapeau pour Samsung I9100 - United Kingdom
Muvit Sticker Drapeau pour Samsung I9100 - USA
QDOS Coque Cubic pour Samsung Galaxy II I9100
QDOS Coque Steel 4 pour Samsung Galaxy S II
Samsung 305U1A 11,6" LED
Samsung 305U1A 11,6" LED + Office Famille et Etudiant 2010 1 poste
Samsung B1930HD 18.5" LCD TNT HD
Samsung B5722 Double SIM
Samsung Bac papier supplķmentaire ML-S3710A - 520 feuilles
Samsung Batterie ED-BP1310
Samsung batterie IA-BH130LB
Samsung batterie IA-BP420E
Samsung batterie IA-BP85ST
Samsung batterie SLB-10A
Samsung batterie SSB-690 ELS
Samsung BD-E5300
Samsung BD-E5500 3D
Samsung BD-E6100 3D
Samsung BD-E8300 3D
Samsung BD-ES5000
Samsung BD-ES6000 3D
Samsung C3050 Stratus
Samsung CŌble Adaptateur HDTV pour Galaxy Tab 8.9" / 10.1"
Samsung CŌble data pour tķlķphones mobiles Samsung
Samsung camķra Skype CY-STC1100
Samsung CB20A12
Samsung Ch@t335 - GT-S3350 - Noir
Samsung Chargeur allume-cigares micro-USB
Samsung chargeur de voyage pour SGH-P260 et SGH-G600 - ModĶle Noir
Samsung Chargeur secteur de voyage micro-USB
Samsung CLP-325 + Toner Samsung CLT-K4072S Noir
Samsung CLP-325 + Toner Samsung CLT-K4072S Noir
Samsung CLP-620ND - Imprimante Ethernet
Samsung CLP-C300A
Samsung CLP-K300A
Samsung CLP-M300A
Samsung CLP-Y300A
Samsung CLX-3185FW WiFi
Samsung CLX-3185FW WiFi + Toner Samsung CLT-K4072S Noir + MCL Samar cŌble imprimante USB 2.0
Samsung CLX-3185N Ethernet
Samsung CLX-3185W - Imprimante Multifonctions WiFi & Ethernet
Samsung CLX-6220FX - Imprimante Multifonctions Ethernet
Samsung Coque pour Galaxy S3 - Blanche
Samsung Coque pour Galaxy S3 - Noire
Samsung CY-SMN1000D meuble TV
Samsung Disque Dur interne SSD 128 Go - 830 Series
Samsung Disque Dur interne SSD 128 Go MZ-7PC128N 830 Series
Samsung Disque Dur interne SSD 256 Go MZ-7PC256D 830 Series
Samsung Disque Dur interne SSD 256 Go MZ-7PC256N 830 Series
Samsung Disque Dur interne SSD 512 Go - 830 Series
Samsung Disque Dur interne SSD 64 Go - 830 Series
Samsung Disque Dur interne SSD 64 Go MZ-7PC064D 830 Series
Samsung dongle Wi-Fi WIS12ABGNX
Samsung DP7000A3B 23" LED Tactile USB 3.0 + Samsung ML-2165 - Imprimante Monochrome
Samsung DP7000A3B 23" LED Tactile USB 3.0 + Sennheiser RS170
Samsung DP7000A3B-A01FR 23" LED Tactile USB 3.0
Samsung DP700A3B-S02FR 23" LED Tactile
Samsung Duo de 2 coques pour Samsung Galaxy II I9100 - 1 Noire + 1 Camel
Samsung Duo de 2 coques pour Samsung Galaxy II I9100 - 1 Noire matelassķe + 1 Rose
Samsung DV300F Argent/Rouge - WiFi
Samsung DV300F Argent/Rouge - WiFi + Etui
Samsung DV300F Noir - WiFi
Samsung DV300F Noir - WiFi + Etui
Samsung E1150 - Silver
Samsung ES90 Noir
Samsung Etui coque pour Galaxy Note - Noir
Samsung Etui coque pour Samsung Galaxy Y S5360 - Noir
Samsung Etui cuir pour Galaxy S II - Noir
Samsung Etui rabat pour Samsung Galaxy S3 - Noir
Samsung Eui cuir pour i9000 Galaxy S
Samsung EX1
Samsung Flash SEF15A
Samsung Flash SEF20A
Samsung Galaxy Ace s5830 (sous Android)
Samsung Galaxy Mini (sous Android)
Samsung Galaxy Note
Samsung Galaxy Note - Blanc
Samsung Galaxy Note - Dark Blue
Samsung Galaxy S2 (I9100G) - Blanc
Samsung Galaxy S2 (I9100G) - Noir
Samsung Galaxy S3 (I9300) - Blanc Marbre
Samsung Galaxy S3 (I9300) - Bleu Galet
Samsung Galaxy S WiFi 4,2" 16 Go
Samsung Galaxy Tab 10,1" TFT 16 Go Blanc Wifi
Samsung Galaxy Tab 10,1" TFT 16 Go Blanc Wifi + HP Housse Mini Sleeve 10,2" pour Netbook et Tablette - Ocean Drive
Samsung Galaxy Tab 10,1" TFT 16 Go Noir Wifi
Samsung Galaxy Tab 10,1" TFT Blanc + Western Digital My Book Live 1 To Ethernet
Samsung Galaxy Tab 10,1" TFT Noir + Western Digital My Book Live 1 To Ethernet
Samsung Galaxy Tab 2 10,1" 16 Go - Argent
Samsung Galaxy Tab 2 10,1" 16 Go - Blanc
Samsung Galaxy Tab 2 7.0" LED 8 Go
Samsung Galaxy Tab 8,9" TFT Blanc 32 Go Wifi
Samsung Galaxy Y Pro B5510 (sous Android)
Samsung Galaxy Y Young s5360 (sous Android)
Samsung Graveur DVD Externe Wifi - SE-208BW - Noir
Samsung Graveur Externe BluRay SE-506AB
Samsung HMX-F80 Noir
Samsung HMX-Q20 Noir
Samsung HMX-QF20 Noir
Samsung HMX-W350 Noir (tout terrain) + Kit Accessoires Sport + micro SDHC 8 Go
Samsung HMX-W350 Rouge (tout terrain) + Kit Accessoires Sport + micro SDHC 8 Go
Samsung Housse Folio pour Galaxy Tab 10,1"
Samsung Housse Folio pour Galaxy Tab 8,9"
Samsung HT-D330
Samsung HT-D350
Samsung HT-D4500
Samsung HT-D5000 3D
Samsung HT-E4200 3D
Samsung HT-E4500 3D
Samsung HT-E5200 3D
Samsung HT-E5530 3D
Samsung HT-ES4200 3D
Samsung HT-ES6200 3D
Samsung HT-ES8200 3D
Samsung HW-E350
Samsung HW-E450
Samsung I9103 Galaxy R (sous Android)
Samsung Kit de connexion USB & SD pour Galaxy Tab 10.1"
Samsung Kit de vidķosurveillance tout-en-un SDE-3003P/EX
Samsung Kit de vidķosurveillance tout-en-un SME-4220
Samsung kit HDMI
Samsung kit papier 10 x 15 cm
Samsung kit piķton filaire stķrķo Jack 3,5 mm
Samsung LE32E420
Samsung LE40D503
Samsung ML-1630/SCX4500
Samsung ML-2010D3
Samsung ML-2165 - Imprimante Monochrome
Samsung ML-2165W - Imprimante WiFi
Samsung ML-2545 - Imprimante Monochrome
Samsung ML-2955DW - Imprimante Ethernet & WiFi
Samsung ML-2955ND - Imprimante Ethernet
Samsung ML-3310D - Imprimante Monochrome
Samsung ML-3710DW - Imprimante Ethernet & WiFi
Samsung MLT-D1052S
Samsung MLT-D1082S
Samsung MLT-D1092S
Samsung MM-D430D
Samsung MM-E320
Samsung MV800 Noir
Samsung MV800 Noir + Etui Zadig & Voltaire Noir
Samsung NP300E7A-S09FR 17,3" LED
Samsung NP700Z5C 15.6" LED
Samsung NP-RC730-S07FR 17.3"LED
Samsung NX1000 Noir + Obj. Samsung NX 18 - 55 mm f/3.5 - 5.6 OIS
Samsung NX200 Noir + Obj. Samsung NX 20 - 50 mm f/3.5 - 5.6 ED i-Function + Flash SEF-8A NG8
Samsung NX 50 - 200 mm f/4.0 - 5.6 ED OIS II i-Fonction; Dķdiķ BoŅtiers Hybrides
Samsung NX 60 mm f/2.8 ED OIS SSA Macro i-Function; dķdiķ BoŅtiers Hybrides
Samsung NX 85 mm f/1.4 ED SSA i-Function; dķdiķ BoŅtiers Hybrides
Samsung NX Pancake 16 mm f/2.4 i-Function; dķdiķ BoŅtiers Hybrides
Samsung NX Pancake 20 mm f/2.8 i-Function; dķdiķ BoŅtiers Hybrides
Samsung NX Pancake 30 mm f/2.0; dķdiķ BoŅtiers Hybrides
Samsung Oreillette Bluetooth HM1200
Samsung Pack d'accessoire pour Galaxy S II I9100
Samsung Pack HMX-F800 Noir : Camķscope HD + Etui + Carte SDHC 4 Go
Samsung Pack HMX-Q200 Noir : Camķscope Full HD + Etui + Carte SDHC 4 Go
Samsung PC portable NP300E5A-S0AFR 15.6"LED
Samsung PL210 Noir
Samsung PL210 Noir + Carte mķmoire Lexar MicroSDHC 8 Go
Samsung Player mini 2 c3310 - Gris Mķtal
Samsung Port parallĶle ML-PAR100 pour imprimante
Samsung PS43E450
Samsung PS43E490 3D
Samsung PS43E490 3D + Console Xbox 360 4 Go
Samsung PS51E450
Samsung PS51E490 3D
Samsung PS51E530
Samsung Q3 noir 4 Go
Samsung Q3 rose 4 Go
Samsung RC530-S03FR 15,6" LED
Samsung RF712 E7P-C7261 17,3" LED 3D Blu-Ray USB 3.0 + lunettes
Samsung S19A100N Moniteur 18,5" - Flat Panel Display
Samsung S22B150N 21,5" LED
Samsung S22B350H 21,5" LED
Samsung S23A750D 23" LED 3D
Samsung S23B350H 23" LED
Samsung S23B550V Moniteur 23" LED
Samsung S24B300HL Moniteur 23,6" LED
Samsung S27B350H 27" LED
Samsung SCX-3405F - Imprimante Multifonctions
Samsung SCX-3405FW - Imprimante Multifonctions WiFi & Ethernet
Samsung SCX-3405 - Imprimante Multifonctions
Samsung SCX-3405W - Imprimante Multifonctions WiFi
Samsung SCX-4200A
Samsung SCX-4729FD - Imprimante Multifonctions Ethernet
Samsung SCX-4729FW - Imprimante Multifonctions Ethernet & WiFi
Samsung SCX-5737FW - Imprimante Multifonctions Ethernet
Samsung SE208AB Graveur DVD externe USB 2.0
Samsung SE-218BB graveur DVD externe ultra slim USB 2.0
Samsung SLB07A pour ST50
Samsung SLB-11A pour Samsung WB1000
Samsung ST200F Noir - WiFi
Samsung ST200F Rouge - WiFi
Samsung ST200F Violet - WiFi
Samsung ST65 Noir
Samsung ST65 Rouge
Samsung ST66 Noir
Samsung ST77 Blanc
Samsung ST77 Noir
Samsung ST77 Rouge
Samsung ST77 Violet
Samsung ST88 Noir
Samsung station d'accueil
Samsung station d'accueil HD2
Samsung Station d'accueil pour tablette Galaxy Tab 8,9"
Samsung station d'accueil SSD-760 E2/EUR
Samsung SyncMaster C23A550U 23" LED
Samsung SyncMaster C23A750X 23" LED
Samsung Syncmaster S23A700D 23" LED 3D
Samsung Syncmaster T22A550 21,5" LED Tuner TNT HD
Samsung SystĶme de vidķosurveillance Baby Monitor SEW-3022WP/ EX
Samsung T22A300 21.5" Tuner TNT HD
Samsung T22B300EW 21,5" LED Tuner TNT HD
Samsung T24B301 24" LED Tuner TNT HD
Samsung T27A550 27" LED Tuner TNT HD
Samsung Toner MLT-D101S pour imprimantes Samsung SCX-3405 & ML-2165 - Noir
Samsung UE19ES4000 LED
Samsung UE22ES5000 LED
Samsung UE22ES5410 LED
Samsung UE26EH4000 LED
Samsung UE26EH4500 LED
Samsung UE32EH4000 LED
Samsung UE32EH5000 LED
Samsung UE32ES5500 LED
Samsung UE32ES6300 LED 3D
Samsung UE32ES6300 LED 3D + Console Xbox 360 4 Go
Samsung UE32ES6710 LED 3D blanc
Samsung UE37ES5500 LED
Samsung UE40D5000 LED
Samsung UE40D6500 LED 3D
Samsung UE40EH5000 LED
Samsung UE40ES5500 LED
Samsung UE40ES6300 LED 3D
Samsung UE40ES6300 LED 3D + Console Xbox 360 4 Go
Samsung UE40ES6710 LED 3D
Samsung UE46EH5000 LED
Samsung UE46ES5500 LED
Samsung UE46ES6300 LED 3D
Samsung UE46ES6300 LED 3D + Console Xbox 360 4 Go
Samsung UE46ES6710 LED 3D blanc
Samsung UE46ES8000 LED 3D
Samsung UE55ES6300 LED 3D
Samsung UE55ES6300 LED 3D + Console Xbox 360 4 Go
Samsung UE60ES6100 LED 3D
Samsung ultrabook NP530U3B 13,3" - Aluminium + Microsoft Explorer Touch Mouse - Souris BlueTrack sans fil
Samsung ultrabook NP530U3B 13,3" LED USB 3.0 - Aluminium
Samsung ultrabook NP530U3B 13,3" LED USB 3.0 - Aluminium+ Samsonite Sac pour ordinateur portable 14,1" S Noir
Samsung ultrabook NP530U3B-A02 13,3" LED USB 3.0 + CaseLogic Sacoche double pour ordinateurs 14" & tablettes 10,1" - Grise
Samsung Ultrabook NP530U3C 13,3" HD LED - Sķrie 5 Ultra - Marron
Samsung Ultrabook NP530U3C 13,3" HD LED - Sķrie 5 Ultra - Rose
Samsung Viseur ķlectronique EVF10
Samsung Wave 575
Samsung WB150F Blanc - WiFi
Samsung WB150F Noir - WiFi
Samsung WB690 Noir
Samsung WB700 Noir
Samsung WB850F Noir - WiFi - GPS
Samsung WMN250M accroche murale
Samsung XE700T1A-A02FR 11,6" 64 Go SSD
Samsung YP-F3 bleu 2 Go
Samsung YP-F3 rose 2 Go
Samsung YP-Q3 rose 8 Go
Samsung YP-Q3 rose 8 Go + Casque JVC HA-S155-P rose
Samsung YP-U6 noir 2 Go
Samsung YP-U6 noir 4 Go
Samsung YP-U6 rose 2 Go
Samsung YP-U6 rose 4 Go
Samsung YP-Z3 blanc 4 Go
Samsung YP-Z3 bleu 4 Go
Samsung YP-Z3 rose 4 Go
Samyang 14 mm f/2.8 Aspherical IF ED UMC; Monture Samsung NX
Samyang 35 mm f/1.4 AS UMC; Monture Samsung NX
Samyang Fish-eye 8 mm f/3.5 Aspherical IF MC; Monture Samsung Type NX
Tablette Samsung Galaxy S WiFi 3,6" 8 Go
Tablette Samsung Galaxy S WiFi 3,6" 8 Go + Casque weSC Conga Matte noir
Tablette Samsung Galaxy S WiFi 4,2" 8 Go
Tablette Samsung Galaxy S WiFi 5" 8 Go
T'nB Coque Clip On pour Samsung Galaxy SII - New York
Toner Samsung CLT-C4072S - Cyan
Toner Samsung CLT-C4092S Cyan
Toner Samsung CLT-K4072S - Noir
Toner Samsung CLT-K4092S Noir
Toner Samsung CLT-M4072S - Magenta
Toner Samsung CLT-M4092S Magenta
Toner Samsung CLT-P4092C - Pack de 4 Toners
Toner Samsung CLT-Y4072S - Jaune
Toner Samsung CLT-Y4092S Jaune
Toner Samsung MLT-D1042S - Noir
We Digital by Samsung - Silver We 1 To USB 2.0
We Digital by Samsung - Silver WE 2 To USB 2.0
Xqisit Coque iPlate Glossy pour Samsung Galaxy S3 - Blanche
Xqisit Coque iPlate Style pour Samsung Galaxy S3 - Transparente/Blanche
Xqisit Coque iPlate Style pour Samsung Galaxy S3 - Transparente/Noire
Xqisit Coque Soft Grip pour Samsung Galaxy S3 - Blanche
Xqisit Coque Soft Grip pour Samsung Galaxy S3 - Noire
Xqisit Etui Flipcover pour Samsung Galaxy S3 - Blanc
Xqisit Etui Flipcover pour Samsung Galaxy S3 - Noir
Samsung - Aspirateur robot Navibot SR8845
Samsung - Aspirateur sans sac EcoStyle SC86G0 gris foncķ/fuchsia
Samsung - Aspirateur sans sac SC4780 noir
Samsung - Four micro-ondes MW73B - blanc
SAMSUNG - Micro ondes 36 L - Micro ondes 36 L - CP1395ES
SAMSUNG - Micro ondes 42 L - Micro ondes 42 L - CQ1570U
Samsung - Micro-ondes combinķ CE117PT-B
SAMSUNG - Micro-ondes Grill simultanķ GS89F-1SP
Samsung 305U1A 11,6" LED
Samsung 305U1A 11,6" LED + Office Famille et Etudiant 2010 1 poste
Samsung Aspirateur sans sac EcoStyle SC86H0 gris clair/bleu
Samsung B1930HD 18.5" LCD TNT HD
Samsung B5722 Double SIM
Samsung Bac papier supplķmentaire ML-S3710A - 520 feuilles
Samsung Batterie ED-BP1310
Samsung batterie IA-BH130LB
Samsung batterie IA-BP420E
Samsung batterie IA-BP85ST
Samsung batterie SLB-10A
Samsung batterie SSB-690 ELS
Samsung BD-E5300
Samsung BD-E5500 3D
Samsung BD-E8300 3D
Samsung C3050 Stratus
Samsung CŌble Adaptateur HDTV pour Galaxy Tab 8.9" / 10.1"
Samsung CŌble data pour tķlķphones mobiles Samsung
Samsung Camķra additionnelle de vidķosurveillance SEB-1015RWP EX
Samsung camķra Skype CY-STC1100
Samsung CB20A12
Samsung Ch@t335 - GT-S3350 - Noir
Samsung Chargeur allume-cigares micro-USB
Samsung chargeur de voyage pour SGH-P260 et SGH-G600 - ModĶle Noir
Samsung Chargeur secteur de voyage micro-USB
Samsung CLP-325 + Toner Samsung CLT-K4072S Noir
Samsung CLP-325 + Toner Samsung CLT-K4072S Noir
Samsung CLP-325 WiFi
Samsung CLP-325 WiFi + Toner Samsung CLT-K4072S Noir + MCL Samar cŌble imprimante USB 2.0
Samsung CLP-620ND - Imprimante Ethernet
Samsung CLP-C300A
Samsung CLP-K300A
Samsung CLP-M300A
Samsung CLP-Y300A
Samsung CLX-3185 + Toner Samsung CLT-K4072S Noir
Samsung CLX-3185 + Toner Samsung CLT-K4072S Noir
Samsung CLX-3185 + Toner Samsung CLT-K4072S Noir
Samsung CLX-3185FW WiFi
Samsung CLX-3185FW WiFi + Toner Samsung CLT-K4072S Noir + MCL Samar cŌble imprimante USB 2.0
Samsung CLX-3185N Ethernet
Samsung CLX-3185W - Imprimante Multifonctions WiFi & Ethernet
Samsung CLX-6220FX - Imprimante Multifonctions Ethernet
Samsung Coque silicone Croisillons pour nexus S
Samsung CY-SMN1000D meuble TV
Samsung Disque Dur interne SSD 128 Go MZ-7PC128D 830 Series
Samsung Disque Dur interne SSD 128 Go MZ-7PC128N 830 Series
Samsung Disque Dur interne SSD 256 Go MZ-7PC256D 830 Series
Samsung Disque Dur interne SSD 256 Go MZ-7PC256N 830 Series
Samsung Disque Dur interne SSD 64 Go MZ-7PC064D 830 Series
Samsung dongle Wi-Fi WIS12ABGNX
Samsung DP7000A3B 23" LED Tactile USB 3.0
Samsung Duo de 2 coques pour Samsung Galaxy II I9100 - 1 Noire + 1 Camel
Samsung Duo de 2 coques pour Samsung Galaxy II I9100 - 1 Noire matelassķe + 1 Rose
Samsung DV300F Argent/Rouge - WiFi
Samsung DV300F Noir - WiFi
Samsung E1150 - Silver
Samsung E2550
Samsung EcoBlue SC61E0 bleu azur
Samsung ES30 Noir
Samsung ES30 Noir + Carte SD 2 Go
Samsung Etui coque pour Galaxy Note - Noir
Samsung Etui cuir pour Galaxy S II - Noir
Samsung Etui flap en cuir pour Samsung Galaxy II I9100 - Noir
Samsung Eui cuir pour i9000 Galaxy S
Samsung Flash SEF15A
Samsung Flash SEF20A
Samsung Galaxy Ace s5830 (sous Andro’d)
Samsung Galaxy Mini (sous Android)
Samsung Galaxy Note
Samsung Galaxy Note - Blanc
Samsung Galaxy Note - Rose
Samsung Galaxy S2 (I9100G) - Blanc
Samsung Galaxy S2 (I9100G) - Noir
Samsung Galaxy Tab 10,1" TFT Blanc 32 Go + Western Digital My Book Live 1 To Ethernet
Samsung Galaxy Tab 10,1" TFT Blanc 32 Go Wifi
Samsung Galaxy Tab 10,1" TFT Noir 16 Go 3G
Samsung Galaxy Tab 8,9" TFT Blanc 32 Go Wifi
Samsung Galaxy Xcover s5690 (sous Andro’d) - Smartphone Samsung Solide certifiķ IP67
Samsung Galaxy Y Pro B5510 (sous Andro’d)
Samsung Galaxy Y Young s5360 (sous Andro’d)
Samsung Graveur DVD Externe Wifi - SE-208BW - Noir
Samsung Housse Folio pour Galaxy Tab 10,1"
Samsung Housse Folio pour Galaxy Tab 8,9"
Samsung HT-D330
Samsung HT-D350
Samsung HT-D423
Samsung HT-D4500
Samsung HT-D5000 3D
Samsung HT-E4200 3D
Samsung HT-E4500 3D
Samsung HT-E5200 3D
Samsung HT-ES6200 3D WiFi
Samsung HW-E450
Samsung I9103 Galaxy R (sous Android)
Samsung Kit de connexion USB & SD pour Galaxy Tab 10.1"
Samsung Kit de vidķosurveillance tout-en-un SDE-3003P/EX
Samsung Kit de vidķosurveillance tout-en-un SME-4220
Samsung Kit Etui + Clavier Bluetooth pour Galaxy Tab 10,1" - Brun foncķ
Samsung kit HDMI
Samsung kit HDMI
Samsung kit papier 10 x 15 cm
Samsung kit piķton filaire stķrķo Jack 3,5 mm
Samsung LE40D550
Samsung Lot de 2 protections d'ķcran pour Galaxy S2 - Transparente/Miroir
Samsung Lot de 2 Protections d'ķcran pour i9000 Galaxy S
Samsung Lunettes 3D SSG-3050GB
SAMSUNG ME106V-SX
Samsung ME82V Micro-onde monofonction
SAMSUNG ME82V-SX
SAMSUNG Micro ondes MW87Y
SAMSUNG Micro-ondes combinķ CE117APT B
SAMSUNG Micro-ondes combinķ CE137NEMX
SAMSUNG Micro-ondes FW113T002
Samsung ML-1630/SCX4500
Samsung ML-2010D3
Samsung ML-2165 - Imprimante Monochrome
Samsung ML-2165W - Imprimante WiFi
Samsung ML-2545 - Imprimante Monochrome
Samsung ML-2955DW - Imprimante Ethernet & WiFi
Samsung ML-2955ND - Imprimante Ethernet
Samsung ML-3310D - Imprimante Monochrome
Samsung ML-3710DW - Imprimante Ethernet & WiFi
Samsung MLT-D1052S
Samsung MLT-D1082S
Samsung MLT-D1092S
Samsung MM-D430D
Samsung MV800 Noir
Samsung MV800 Noir + Etui Zadig & Voltaire Noir
Samsung NP300E7A-S03FR 17,3" LED
Samsung NP700Z5A-S02FR 15,6" LED
Samsung NX 60 mm f/2.8 ED OIS SSA Macro i-Function; dķdiķ BoŅtiers Hybrides
Samsung NX 85 mm f/1.4 ED SSA i-Function; dķdiķ BoŅtiers Hybrides
Samsung NX Pancake 16 mm f/2.4 i-Function; dķdiķ BoŅtiers Hybrides
Samsung NX Pancake 20 mm f/2.8 i-Function; dķdiķ BoŅtiers Hybrides
Samsung NX Pancake 30 mm f/2.0; dķdiķ BoŅtiers Hybrides
Samsung NX200 Noir + Obj. Samsung NX 18 - 55 mm f/3.5 - 5.6 OIS + Flash SEF-8A NG8
Samsung NX200 Noir + Obj. Samsung NX 20 - 50 mm f/3.5 - 5.6 ED i-Function + Flash SEF-8A NG8
Samsung Oreillette Bluetooth HM1200
Samsung Pack d'accessoire pour Galaxy S II I9100
Samsung Pack ķtui cuir + chargeur + protection d'ķcran pour Galaxy S
Samsung PL170 Noir
Samsung PL210 Noir
Samsung PL210 Noir + Carte mķmoire Lexar MicroSDHC 8 Go
Samsung PL90 Noir et Rouge
Samsung Player mini 2 c3310 - Gris Mķtal
Samsung Player Mini C3300 - Noir
Samsung Port parallĶle ML-PAR100 pour imprimante
Samsung PS43D450
Samsung PS43E450
Samsung PS43E490 3D
Samsung PS51E450
Samsung PS51E490 3D
Samsung PS59D530
Samsung Q3 rose 4 Go
Samsung RC530-S03FR 15,6" LED
Samsung RC730-S06FR 17,3" LED
Samsung RF712 E7P-C7261 17,3" LED 3D Blu-Ray USB 3.0 + lunettes
Samsung S22A300B 21,5" TFT
Samsung S22B350H 21,5" LED
Samsung S23A750D 23" LED 3D
Samsung S23B350H 23" LED
Samsung S24B300HL Moniteur 23,6" LED
Samsung S27B350H 27" LED
Samsung SC4340 noir ķbĶne
Samsung SC4790 - Aspirateur sans sac - traineau - rouge
Samsung SCX-3405 - Imprimante Multifonctions
Samsung SCX-3405F - Imprimante Multifonctions
Samsung SCX-3405FW - Imprimante Multifonctions WiFi & Ethernet
Samsung SCX-3405W - Imprimante Multifonctions WiFi
Samsung SCX-4200A
Samsung SCX-4729FD - Imprimante Multifonctions Ethernet
Samsung SCX-4729FW - Imprimante Multifonctions Ethernet & WiFi
Samsung SCX-5737FW - Imprimante Multifonctions Ethernet
Samsung SE-084D graveur DVD externe slim USB 2.0
Samsung SE208AB Graveur DVD externe USB 2.0
Samsung SLB07A pour ST50
Samsung SLB-11A pour Samsung WB1000
Samsung ST65 Noir
Samsung ST65 Rouge
Samsung station d'accueil
Samsung station d'accueil HD2
Samsung Station d'accueil pour tablette Galaxy Tab 10,1"
Samsung Station d'accueil pour tablette Galaxy Tab 8,9"
Samsung station d'accueil SSD-760 E2/EUR
Samsung SyncMaster C23A550U 23" LED
Samsung SyncMaster C23A750X 23" LED
Samsung Syncmaster S23A700D 23" LED 3D
Samsung SyncMaster S24A350H 24" LED
Samsung Syncmaster T22A550 21,5" LED Tuner TNT HD
Samsung SystĶme de vidķosurveillance Baby Monitor SEW-3022WP/ EX
Samsung T22A350 21,5" LED Tuner TNT
Samsung Toner MLT-D101S pour imprimantes Samsung SCX-3405 & ML-2165 - Noir
Samsung UE19D4010 LED
Samsung UE19ES4000 LED
Samsung UE22ES5000 LED
Samsung UE22ES5410 LED
Samsung UE26EH4000 LED
Samsung UE26EH4500 LED
Samsung UE32D5000 LED
Samsung UE32EH4000 LED
Samsung UE32EH5000 LED
Samsung UE32ES5500 LED
Samsung UE32ES6300 LED 3D
Samsung UE32ES6710 LED 3D blanc
Samsung UE40D5000 LED
Samsung UE40D5710 LED
Samsung UE40D6500 LED 3D
Samsung UE40EH5000 LED
Samsung UE40ES5500 LED
Samsung UE40ES6300 LED 3D
Samsung UE40ES6710 LED 3D
Samsung UE46EH5000 LED
Samsung UE46ES5500 LED
Samsung UE46ES6300 LED 3D
Samsung UE46ES6710 LED 3D blanc
Samsung UE55ES6300 LED 3D
Samsung ultrabook NP530U3B-A02 13,3" + Microsoft Explorer Touch Mouse - Souris BlueTrack sans fil
Samsung ultrabook NP530U3B-A02 13,3" LED USB 3.0
Samsung ultrabook NP530U3B-A02 13,3" LED USB 3.0 + CaseLogic Sacoche double pour ordinateurs 14" & tablettes 10,1" - Grise
Samsung ultrabook NP530U3B-A02 13,3" LED USB 3.0 + Samsonite Sac pour ordinateur portable 14,1" S Noir
Samsung ultrabook NP530U4B-S01FR 14" LED + Microsoft Explorer Touch Mouse - Souris BlueTrack sans fil
Samsung ultrabook NP530U4B-S01FR 14" LED USB 3.0
Samsung ultrabook NP530U4B-S01FR 14" LED USB 3.0 + CaseLogic Sacoche double pour ordinateurs 14" & tablettes 10,1" - Grise
Samsung ultrabook NP530U4B-S01FR 14" LED USB 3.0 + Samsonite Sac pour ordinateur portable 14,1" S Noir
Samsung Viseur ķlectronique EVF10
Samsung WB150F Blanc - WiFi
Samsung WB150F Noir - WiFi
Samsung WB700 Noir
Samsung WB750 Noir
Samsung WIS09ABGN LinkStick WLAN-Adapter
Samsung WMN250M accroche murale
Samsung YP-F3 bleu 2 Go
Samsung YP-F3 noir 2 Go
Samsung YP-F3 rose 2 Go
Samsung YP-Q3 rose 8 Go
Samsung YP-Q3 rose 8 Go + Casque JVC HA-S155-P rose
Samsung YP-U6 noir 2 Go
Samsung YP-U6 noir 4 Go
Samsung YP-U6 rose 2 Go
Samsung YP-U6 rose 4 Go
Samsung YP-Z3 blanc 4 Go
Samsung YP-Z3 bleu 4 Go
Samsung YP-Z3 rose 4 Go
GT-B7330
user manualii
using this
manual
This user manual has been specially designed to
guide you through the functions and features of
your device. To get started quickly, refer to the
quick start guide.
Instructional icons
Before you start, familiarise yourself with the
icons you will see in this manual:
WarningŚsituations that could cause
injury to yourself or others
CautionŚsituations that could cause
damage to your device or other
equipment
NoteŚnotes, usage tips, or additional
information
X Refer toŚpages with related
information; for example: X p. 12
(represents "see page 12")iii
using this manual
Copyrights and trademarks
Rights to all technologies and products that
comprise this device are the property of their
respective owners:
? Followed byŚthe order of options or
menus you must select to perform a
step; for example: Press ?
? Windows Media
(represents Start, followed by More,
followed by Windows Media)
[ ] Square bracketsŚdevice keys;
for example: [ ] (represents the End/
Power key)
< > Angled bracketsŚsoftkeys that control
different functions at each screen; for
example: (represents the
Select softkey)
Ģ This product includes
software licensed from MS,
an affiliate of the Microsoft
Corporation. Microsoft and software bearing
the Microsoft name are registered
trademarks of the Microsoft Corporation.
Ģ JavaÖ is a trademark of Sun Microsystems,
Inc.
Ģ Bluetooth« is a registered trademark of the
Bluetooth SIG, Inc. worldwide.
Bluetooth QD ID: B015816
Ģ Windows Media Player« is a registered
trademark of Microsoft Corporation.
Ģ Wi-Fi«, the Wi-Fi CERTIFIED logo, and the
Wi-Fi logo are registered trademarks of the
Wi-Fi Alliance.iv
contents
safety and usage information .................. 1
Safety warnings .......................................... 1
Safety precautions ...................................... 4
Important usage information ....................... 6
quick start guide .................................... 12
Unpack ..................................................... 12
Phone layout ............................................ 13
Keys ......................................................... 14
Icons ........................................................ 15
Assemble and prepare your device ........... 16
Turn on your device on and off ................. 19
Work with applications .............................. 20
Use basic call functions ............................ 21
Send and view text messages .................. 22
Add and find contacts .............................. 23
Use basic camera functions ...................... 24
Listen to music ......................................... 25
Customise your device ............................. 27
Download applications from the web ........ 28v
contents
communication ....................................... 29
Calls ......................................................... 29
Messaging ................................................ 30
media ...................................................... 34
Camera .................................................... 34
Contents Manager .................................... 38
Photo Slides ............................................. 40
FM Radio .................................................. 41
Streaming Player ...................................... 43
Audio Notes .............................................. 43
Voice Notes .............................................. 44
personal productivity ............................. 45
Contacts ................................................... 45
Calendar ................................................... 46
Anniversary ............................................... 47
Office Mobile ............................................ 47
Adobe« Reader LE ................................... 50
Tasks ........................................................ 50
Smart Reader ........................................... 51
web ......................................................... 53
Internet Explorer ....................................... 53
Messenger ............................................... 54
RSS Reader ............................................. 55
Podcast .................................................... 57
Communities ............................................ 58
FringÖ ..................................................... 59
Microsoft My Phone ................................. 59
Search Widget .......................................... 59
connectivity ............................................ 60
Wi-Fi ......................................................... 60
Bluetooth .................................................. 61
USB ......................................................... 63
ActiveSync ............................................... 64
Internet Sharing ........................................ 66
Connections ............................................. 67
additional programs ............................... 69
Games ..................................................... 69
Java ......................................................... 69vi
contents
World Clock .............................................. 70
Alarms ...................................................... 70
Calculator ................................................. 71
Tip Calculator ........................................... 71
Smart Converter ....................................... 71
StopWatch ............................................... 72
Search ...................................................... 72
My Files .................................................... 72
Settings ................................................... 73
troubleshooting ........................................ a
index ......................................................... e1
safety and
usage
information
Comply with the following precautions to avoid
dangerous or illegal situations and ensure peak
performance of your device.
Keep your device away from small
children and pets
Keep your device and all accessories out of the
reach of small children or animals. Small parts
may cause choking or serious injury if
swallowed.
Protect your hearing
Safety warnings
Listening to a headset at high
volumes can damage your hearing.
Use only the minimum volume setting
necessary to hear your conversation
or music.2
safety and usage information
Install mobile devices and
equipment with caution
Ensure that any mobile devices or related
equipment installed in your vehicle are securely
mounted. Avoid placing your device and
accessories near or in an air bag deployment
area. Improperly installed wireless equipment
can cause serious injury when air bags inflate
rapidly.
Handle and dispose of batteries and
chargers with care
Ģ Use only Samsung-approved batteries and
chargers specifically designed for your
device. Incompatible batteries and chargers
can cause serious injuries or damage to your
device.
Ģ Never dispose of batteries or devices in a
fire. Follow all local regulations when
disposing of used batteries or devices.
Ģ Never place batteries or devices on or in
heating devices, such as microwave ovens,
stoves, or radiators. Batteries may explode
when overheated.
Ģ Never crush or puncture the battery. Avoid
exposing the battery to high external
pressure, which can lead to an internal short
circuit and overheating.
Avoid interference with pacemakers
Maintain a minimum of 15 cm (6 inches)
between mobile devices and pacemakers to
avoid potential interference, as recommended
by manufacturers and the independent
research group, Wireless Technology
Research. If you have any reason to suspect
that your device is interfering with a pacemaker
or other medical device, turn off the device
immediately and contact the manufacturer of
the pacemaker or medical device for guidance.3
safety and usage information
Turn off the device in potentially
explosive environments
Do not use your device at refuelling points
(service stations) or near fuels or chemicals.
Turn off your device whenever directed by
warning signs or instructions. Your device could
cause explosions or fire in and around fuel or
chemical storage and transfer areas or blasting
areas. Do not store or carry flammable liquids,
gases, or explosive materials in the same
compartment as the device, its parts, or
accessories.
Reduce the risk of repetitive motion
injuries
While using your device, hold the device with a
relaxed grip, press the keys lightly, use special
features that reduce the number of keys you
have to press (such as templates and
predictive text), and take frequent breaks.
Do not use the phone if the screen
is cracked or broken
Broken glass or acrylic could cause injury to
your hand and face. Bring the phone to a
Samsung service centre to replace the
screen. Damage caused by careless
handling will void your manufacturerÆs
warranty.4
safety and usage information
Drive safely at all times
Avoid using your device while driving and obey
all regulations that restrict the use of mobile
devices while driving. Use hands-free
accessories to increase your safety when
possible.
Follow all safety warnings and
regulations
Comply with any regulations that restrict the use
of a mobile device in a certain area.
Use only Samsung-approved
accessories
Using incompatible accessories may damage
your device or cause injury.
Turn off the device near medical
equipment
Your device can interfere with medical
equipment in hospitals or health care facilities.
Follow all regulations, posted warnings, and
directions from medical personnel.
Turn off the device or disable the
wireless functions when in an
aircraft
Your device can cause interference with aircraft
equipment. Follow all airline regulations and turn
off your device or switch to a mode that
disables the wireless functions when directed
by airline personnel.
Safety precautions5
safety and usage information
Protect batteries and chargers from
damage
Ģ Avoid exposing batteries to very cold or very
hot temperatures (below 0░ C/32░ F or
above 45░ C/113░ F). Extreme temperatures
can reduce the charging capacity and life of
your batteries.
Ģ Prevent batteries from contacting metal
objects, as this can create a connection
between the + and - terminals of your
batteries and lead to temporary or
permanent battery damage.
Ģ Never use a damaged charger or battery.
Handle your device carefully and
sensibly
Ģ Do not disassemble your phone due to a
risk of electric shock.
Ģ Do not allow your phone to get wetŚliquids
can cause serious damage and will change
the color of the label that indicates water
damage inside the phone. Do not handle
your phone with wet hands. Water damage
to your phone can void your manufacturerÆs
warranty.
Ģ Avoid using or storing your device in dusty,
dirty areas to prevent damage to moving
parts.
Ģ Your device is a complex electronic
deviceŚprotect it from impacts and rough
handling to avoid serious damage.
Ģ Do not paint your device, as paint can clog
moving parts and prevent proper operation.
Ģ If your device has a camera flash or light,
avoid using it close to the eyes of children or
animals.6
safety and usage information
Ģ Your device may be damaged by exposure
to magnetic fields. Do not use carrying
cases or accessories with magnetic
closures or allow your device to come in
contact with magnetic fields for extended
periods of time.
Avoid interference with other
electronic devices
Your device emits radio frequency (RF) signals
that may interfere with unshielded or improperly
shielded electronic equipment, such as
pacemakers, hearing aids, medical devices,
and other electronic devices in homes or
vehicles. Consult the manufacturers of your
electronic devices to solve any interference
problems you experience.
Use your device in the normal
position
Avoid contact with your deviceÆs internal
antenna.
Allow only qualified personnel to
service your device
Allowing unqualified personnel to service your
device may result in damage to your device and
will void your warranty.
Ensure maximum battery and
charger life
Ģ Avoid charging batteries for more than a
week, as overcharging may shorten battery
life.
Ģ Over time, unused batteries will discharge
and must be recharged before use.
Important usage information7
safety and usage information
Ģ Disconnect chargers from power sources
when not in use.
Ģ Use batteries only for their intended
purpose.
Handle SIM cards and memory
cards with care
Ģ Do not remove a card while the device is
transferring or accessing information, as this
could result in loss of data and/or damage to
the card or device.
Ģ Protect cards from strong shocks, static
electricity, and electrical noise from other
devices.
Ģ Frequent writing and erasing will shorten the
life span of memory cards.
Ģ Do not touch gold-coloured contacts or
terminals with your fingers or metal objects. If
dirty, wipe the card with a soft cloth.
Ensure access to emergency
services
Emergency calls from your device may not be
possible in some areas or circumstances.
Before travelling in remote or undeveloped
areas, plan an alternate method of contacting
emergency services personnel.
Specific Absorption Rate (SAR)
certification information
Your device conforms to European Union (EU)
standards that limit human exposure to radio
frequency (RF) energy emitted by radio and
telecommunications equipment. These
standards prevent the sale of mobile devices
that exceed a maximum exposure level (known
as the Specific Absorption Rate, or SAR) of 2.0
watts per kilogram.8
safety and usage information
During testing, the maximum SAR recorded for
this model was 0.814 watts per kilogram. In
normal use, the actual SAR is likely to be much
lower, as the device has been designed to emit
only the RF energy necessary to transmit a
signal to the nearest base station. By
automatically emitting lower levels when
possible, your device reduces your overall
exposure to RF energy.
The Declaration of Conformity at the back of
this manual demonstrates your deviceÆs
compliance with the European Radio & Terminal
Telecommunications Equipment (R&TTE)
directive. For more information about the SAR
and related EU standards, visit the Samsung
mobile website.
Correct disposal of this product
(Waste Electrical & Electronic Equipment)
(Applicable in the European Union
and other European countries with
separate collection systems)
This marking on the product,
accessories or literature indicates
that the product and its electronic accessories
(e.g. charger, headset, USB cable) should not
be disposed of with other household waste at
the end of their working life. To prevent possible
harm to the environment or human health from
uncontrolled waste disposal, please separate
these items from other types of waste and
recycle them responsibly to promote the
sustainable reuse of material resources.9
safety and usage information
Household users should contact either the
retailer where they purchased this product, or
their local government office, for details of
where and how they can take these items for
environmentally safe recycling.
Business users should contact their supplier
and check the terms and conditions of the
purchase contract. This product and its
electronic accessories should not be mixed
with other commercial wastes for disposal.
Correct disposal of batteries in this
product
(Applicable in the European Union
and other European countries with
separate battery return systems)
This marking on the battery, manual
or packaging indicates that the
batteries in this product should not be disposed
of with other household waste at the end of
their working life. Where marked, the chemical
symbols Hg, Cd or Pb indicate that the battery
contains mercury, cadmium or lead above the
reference levels in EC Directive 2006/66. If
batteries are not properly disposed of, these
substances can cause harm to human health
or the environment.
To protect natural resources and to promote
material reuse, please separate batteries from
other types of waste and recycle them through
your local, free battery return system.
This EEE is compliant with RoHS.10
safety and usage information
Disclaimer
Some content and services accessible through
this device belong to third parties and are
protected by copyright, patent, trademark and/
or other intellectual property laws. Such content
and services are provided solely for your
personal noncommercial use. You may not use
any content or services in a manner that has
not been authorised by the content owner or
service provider. Without limiting the foregoing,
unless expressly authorised by the applicable
content owner or service provider, you may not
modify, copy, republish, upload, post, transmit,
translate, sell, create derivative works, exploit,
or distribute in any manner or medium any
content or services displayed through this
device.
ōTHIRD PARTY CONTENT AND SERVICES ARE
PROVIDED "AS IS." SAMSUNG DOES NOT
WARRANT CONTENT OR SERVICES SO
PROVIDED, EITHER EXPRESSLY OR
IMPLIEDLY, FOR ANY PURPOSE.
SAMSUNG EXPRESSLY DISCLAIMS ANY
IMPLIED WARRANTIES, INCLUDING BUT NOT
LIMITED TO, WARRANTIES OF
MERCHANTABILITY OR FITNESS FOR A
PARTICULAR PURPOSE. SAMSUNG DOES
NOT GUARANTEE THE ACCURACY, VALIDITY,
TIMELINESS, LEGALITY, OR COMPLETENESS
OF ANY CONTENT OR SERVICE MADE
AVAILABLE THROUGH THIS DEVICE AND
UNDER NO CIRCUMSTANCES, INCLUDING
NEGLIGENCE, SHALL SAMSUNG BE LIABLE,
WHETHER IN CONTRACT OR TORT, FOR ANY
DIRECT, INDIRECT, INCIDENTAL, SPECIAL OR
CONSEQUENTIAL DAMAGES, ATTORNEY
FEES, EXPENSES, OR ANY OTHER
DAMAGES ARISING OUT OF, OR IN
CONNECTION WITH, ANY INFORMATION
CONTAINED IN, OR AS A RESULT OF THE
USE OF ANY CONTENT OR SERVICE BY YOU
OR ANY THIRD PARTY, EVEN IF ADVISED OF
THE POSSIBILITY OF SUCH DAMAGES." 11
safety and usage information
Third party services may be terminated or
interrupted at any time, and Samsung makes
no representation or warranty that any content
or service will remain available for any period of
time. Content and services are transmitted by
third parties by means of networks and
transmission facilities over which Samsung has
no control. Without limiting the generality of this
disclaimer, Samsung expressly disclaims any
responsibility or liability for any interruption or
suspension of any content or service made
available through this device.
Samsung is neither responsible nor liable for
customer service related to the content and
services. Any question or request for service
relating to the content or services should be
made directly to the respective content and
service providers.12
quick start guide
Unpack
Check your product box for the following items:
Ģ Mobile device
Ģ Headset
Ģ Battery
Ģ Travel adapter (charger)
Ģ PC data cable
Ģ User manual
Ģ CD-ROM1
Ģ The items supplied with your device may
vary depending on the software and
accessories available in your region or
offered by your service provider. You can
obtain additional accessories from your
local Samsung dealer.
Ģ The supplied accessories perform best for
your phone.
1. The CD-ROM contains Microsoft ActiveSync software, add-on
software, and other applications.13
quick start guide
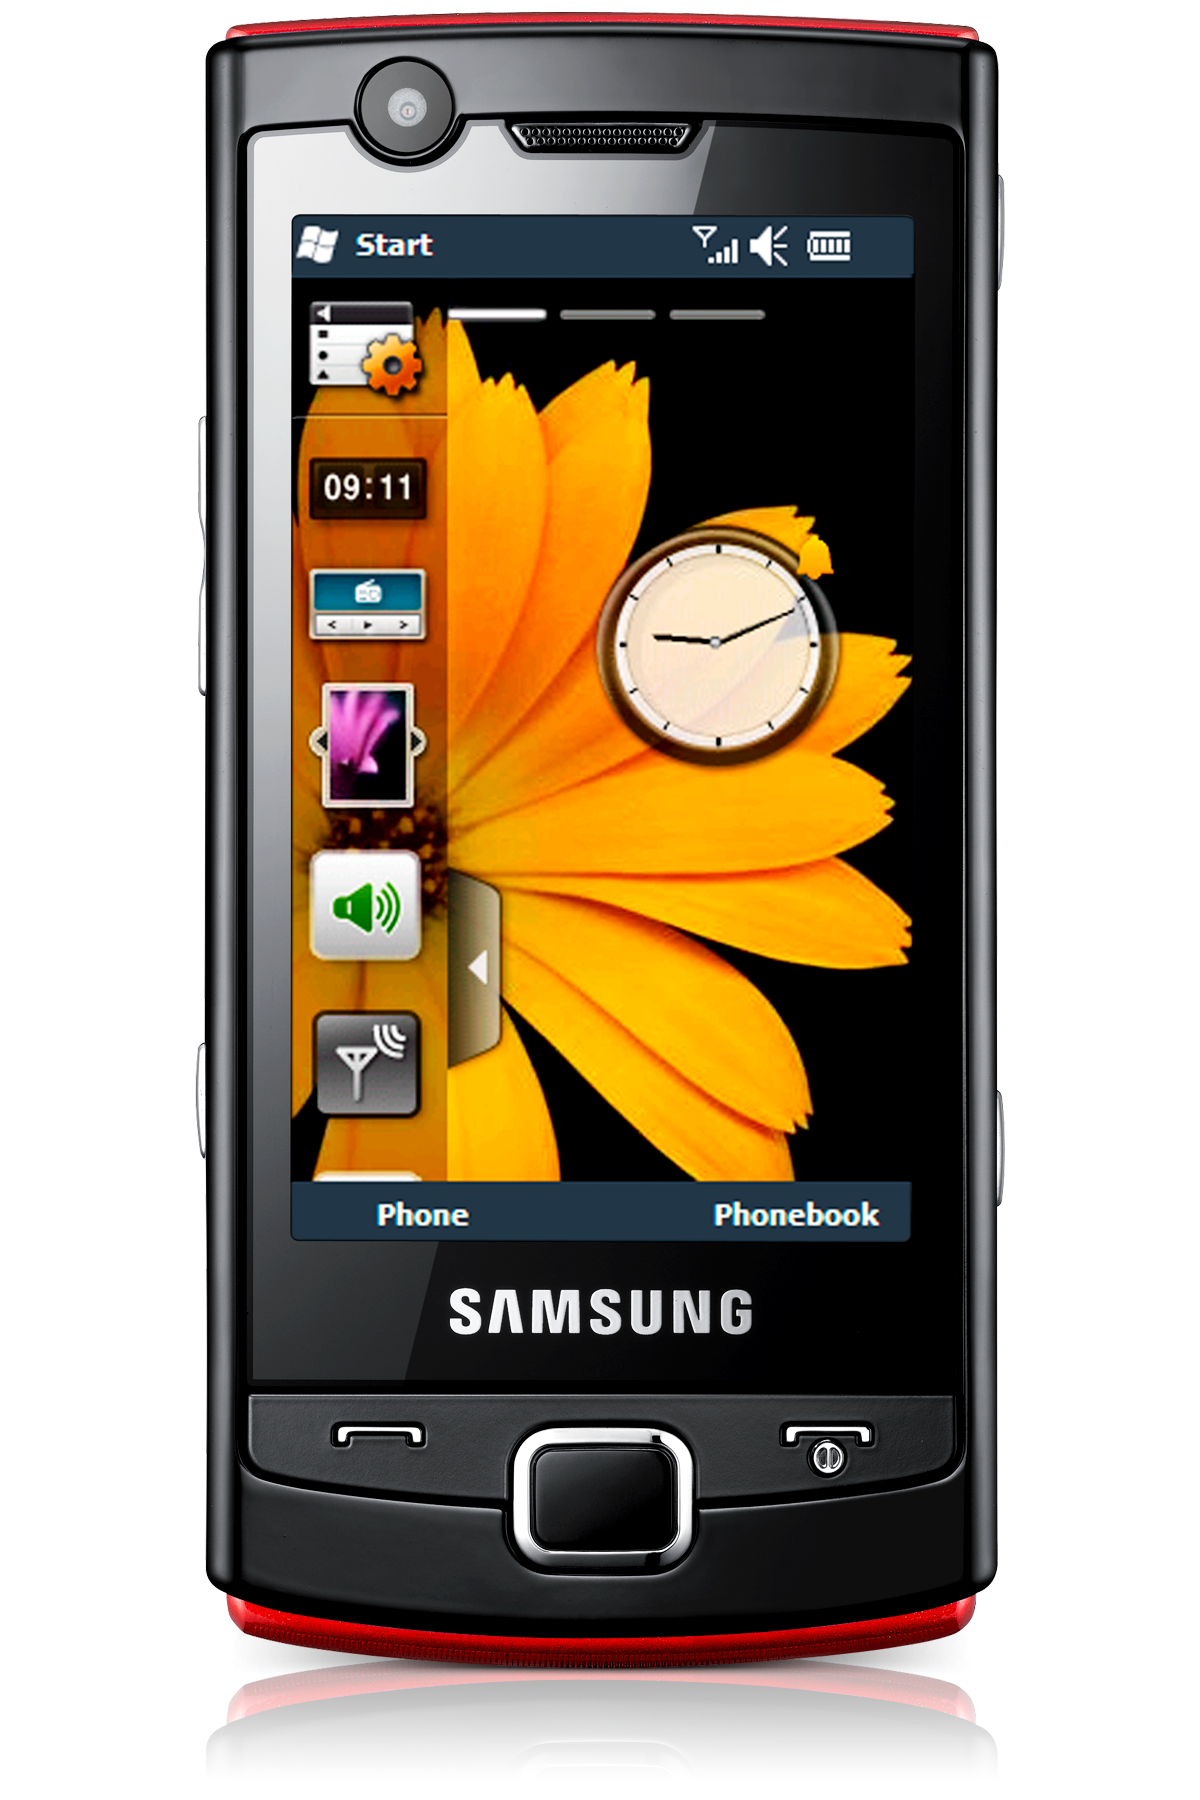
Phone layout
The front of your device includes the following
keys and features:
The rear of your device includes the following
keys and features:
Volume key
Talk key
Home/Task
Manager key
QWERTY
keyboard
Display
End/Power key
Right softkey
Back/Delete key
4-way
navigation key
Left softkey
Confirm key
Mouthpiece
Front camera
lens for video
calls
Earpiece
Light
Multifunction
jack
Battery cover
Internal antenna
Speaker
Memory
card slot
Camera
key
Rear
camera lens14
quick start guide
Keys
Key Function
Open the dialling screen; Make or
answer a call
Perform actions indicated at the
bottom of the display
Scroll through lists or menus; Move
the cursor up, down, left, or right
Confirm your selection or execute
the selected application
Turn the device on and off (press
and hold); End a call; Return to the
Home screen
Switch to the Home screen from a
program; Open Task Manager
(press and hold)
Return to the previous menu or
screen; Delete characters
~
Enter numbers, characters, and
symbols
Delete characters
Change case in a text input field
Confirm your selection; Start a new
line in a text input field
Use characters on the upper half of
the keys in a text input field
Open the symbol screen in a text
input field (press and hold)
Key Function15
quick start guide
Icons
Learn about the icons that appear on your
display.
Insert a space in the text input
screen; Activate or deactivate the
silent profile from the Home screen
(press and hold)
Open Messaging
Open the Quick list screen; Lock
the keys (press and hold)
Turn on the camera (press and
hold); In Camera mode, take a
photo or record a video
Adjust the deviceÆs volume; During
an incoming call, mute the call
ringer; Press and hold the Volume
key up to zoom in the screen
Key Function
Icon Definition
Signal strength
Voice call in progress
Data call in progress
Call on hold
GPRS network available
GPRS network connected
EDGE network available
EDGE network connected
Roaming in GPRS network
UMTS network available
HSDPA network available16
quick start guide
Assemble and prepare your
device
Get started by assembling and setting up your
mobile device for its first use.
Install the SIM or USIM card and
battery
When you subscribe to a cellular service, you
will receive a Subscriber Identity Module (SIM)
card, with subscription details, such as your
personal identification number (PIN) and
optional services.
To use UMTS or HSDPA services, you can
purchase a Universal Subscriber Identity
Module (USIM) card.
Battery power level
Ringer set to vibrate
Phone line 1 or 2 (network service)
Roaming (outside of normal service
area)
Bluetooth activated
Bluetooth headset connected
Sync error
New text message
New multimedia message
New instant message
New voice mail message
Missed call
Calls are forwarded
Icon Definition17
quick start guide
To install the SIM or USIM card and battery,
1. Remove the battery cover.
2. Insert the SIM or USIM card.
3. Insert the battery.
4. Replace the battery cover.
If the device is on, press and hold [ ] to
turn it off.
Ģ Place the SIM or USIM card in the device
with the gold-coloured contacts facing
down.
Ģ Without inserting a SIM or USIM card, you
can use your deviceÆs non-network
services and some menus.18
quick start guide
Charge the battery
Before using the device for the first time, you
must charge the battery.
1. Open the cover to the multifunction jack on
the side of the device.
2. Plug the small end of the travel adapter into
the multifunction jack.
3. Plug the large end of the travel adapter into
a power outlet.
4. When the battery is fully charged (the
icon is no longer moving), unplug the travel
adapter from the power outlet.
5. Unplug the travel adapter from the device.
6. Close the cover to the multifunction jack.
Improperly connecting the travel adapter
can cause serious damage to the device.
Any damages by misuse are not covered by
the warranty.
With the triangle facing up
About the low battery indicator
When your battery is low, the device will emit
a warning tone and a low battery message.
The battery icon will also be empty and
blinking. If the battery level becomes too low,
the device will automatically power off.
Recharge your battery to continue using your
device.19
quick start guide
Insert a memory card (optional)
To store additional multimedia files, you must
insert a memory card. Your device accepts
microSDTM or microSDHCTM memory cards up
to 32 GB (depending on memory card
manufacturer and type).
1. Open the cover to the memory card slot on
the side of the device.
2. Insert a memory card with the label side
facing down.
3. Push the memory card in the memory card
slot until it locks in place.
To remove the memory card, push it gently until
it disengages from the device, and then pull the
memory card out of the memory card slot.
Turn on your device on and off
To turn your device on, press and hold [ ] to
turn on your device.
Your device will automatically connect to the
cellular network.
To turn your device off, press and hold [ ].
Lock or unlock the keys
You can lock the keys to prevent any unwanted
device operations. On the Home screen, press
and hold [ ].
To unlock the keys, press [ ] ? ?
[ ].
Formatting the memory card on a PC may
cause incompatibility with your phone.
Format the memory card only on the phone.20
quick start guide
Disable wireless functions
By disabling your device's wireless functions,
you can use non-network services in areas
where wireless devices are prohibited, such as
aeroplanes and hospitals.
To disable wireless functions,
1. On the Home screen, press [ ] ?
Wireless Manager.
2. Select Phone.
Your device will show on the Home
screen.
3. Press .
To enable wireless functions, repeat steps 1-2
above. Your device will show on the Home
screen.
Work with applications
Open applications or folders
1. On the Home screen, press .
2. Select an application or a folder.
To use the home screen shortcuts, on the
Home screen, scroll up or down to move
among the shortcuts or menus.
Switch applications
Your device allows you to multi-task by running
multiple applications at the same time.
To switch from one active application to
another,
1. Press [ ] ? .
2. Select an application or a folder.21
quick start guide
Close applications
To close the current application window, press
[ ].
To close an application that is running in the
background,
1. Press and hold [ ] to open Task Manager.
2. Scroll to an application and press
.
To close all applications press ?
End All Tasks ? .
Use basic call functions
Learn to make or answer calls and use basic
call functions.
Make a call
1. On the Home screen, enter an area code
and phone number.
2. Press [ ] to dial the number.
For a video call, press ? Video
Call.
3. To end the call, press [ ].
Answer a call
1. When a call comes in, press [ ].
2. For a video call, press to allow
the caller to see you via the front camera
lens.
3. To end the call, press [ ].
Adjust the volume
To adjust the volume during a call, press the
Volume key up or down.22
quick start guide
View and dial missed calls
Your device will display calls you have missed
on the display. To dial the number of a missed
call,
1. Press [ ].
2. Scroll to the missed call you want to dial.
3. Press [ ] to dial.
Call a recently dialled number
1. On the Home screen, press [ ] to display
a list of recent numbers.
2. Scroll to the number you want and press
[ ] to dial.
Send and view text messages
Learn to send or view text (SMS) messages.
Send a text message
1. On the Home screen, press ?
Messaging ? SMS/MMS.
2. Press ? New.
3. Enter a phone number or press the Confirm
key to select a contact.
4. Scroll down and enter text.
5. Press to send the message.
Enter text
Your device is equipped with a QWERTY
keyboard to support easy and quick text input.
You can enter text as you would when using a
computerÆs keyboard.23
quick start guide
When entering text, use the following keys:
Ģ : delete characters
Ģ : start a new line
Ģ : change case; set Caps lock (press twice
quickly)
Ģ Alt: enter numbers and symbols on the
upper part of the keys; set Number and
Symbol lock (press twice quickly)
Ģ sym: open the symbols list (press and hold)
Ģ Space: insert a space
View a text message
1. On the Home screen, press ?
Messaging ? SMS/MMS.
2. Select a text message.
Add and find contacts
Learn the basics of using the Contacts feature.
Add a new contact
1. On the Home screen, enter a phone
number and press .
2. Press the Confirm key ? a contact type.
3. Enter contact information.
4. When you are finished entering information,
press or to save the
contact card.
Find a contact
1. On the Home screen, press ?
Contacts.
2. Enter the first few letters of the name you
want to find.
3. Scroll to the contactÆs name from the
search list.
Once you have found a contact, you can:
Ģ call the contact by pressing [ ]
Ģ edit the contact information by pressing
? Edit24
quick start guide
Use basic camera functions
Learn the basics to capture and view photos
and videos.
Capture photos
1. Press and hold the Camera key to turn on
the camera.
2. Aim the lens at the subject and make any
adjustments.
Ģ To change the viewfinder, press the
Navigation key up ( ).
Ģ To select the time delay, press the
Navigation key down ( ).
Ģ To change the camera focus, press the
Navigation left ( ).
Ģ To set the exposure value, press the
Navigation key right ( ).
3. Press the Confirm key or Camera key to
take a photo.
4. Press to save the photo.
After capturing photos, press to view
photos quickly.
View photos
On the Home screen, press ?
Contents Manager ? My Pictures ? a photo
file.
Capture videos
1. Press and hold the Camera key to turn on
the camera.
2. Press [1] to switch to Recording mode.25
quick start guide
3. Aim the lens at the subject and make any
adjustments.
Ģ To change the viewfinder, press the
Navigation key up ( ).
Ģ To select the time delay, press the
Navigation key down ( ).
Ģ To set the exposure value, press the
Navigation key right ( ).
4. Press the Confirm key or Camera key to
start recording.
5. Press < > to stop recording.
6. Press to save the video.
After capturing videos, press to view
videos quickly.
View videos
On the Home screen, press ?
Contents Manager ? My Videos ? a video
file.
Listen to music
Learn how to listen to music via the music
player.
Add music files to your device
Start by adding files to your device or memory
card:
Ģ Download from the wireless web.
Ģ Receive via Bluetooth.
Ģ Copy to your memory card.
Ģ Synchronise with ActiveSync.
Play music files
1. Add music files to your device.
2. On the Home screen, press ?
? Windows Media.
3. Press ? Update Library.
4. When libraries have been updated, press
.26
quick start guide
5. Select My Music.
6. Select a music category ? a music file.
7. Control playback using the following keys:
8. When you are finished, press ?
Stop.
Create a playlist
1. On the Home screen, press ?
? Windows Media.
2. Press ? Library ? My Music.
3. Select a music category and scroll to a
music file.
4. Press ? Queue Up.
5. Repeat steps 3-4 to add more files.
6. Press ? Now Playing ?
? Save Playlist.
7. Enter a name for the playlist and press
.
The new playlist will be saved in My
Playlists.
Key Function
Confirm Pause or resume playback
Volume Adjust the volume
Navigation
Ģ Left: Restart playback; Skip
backward (press within 3
seconds); Scan backward
in a file (press and hold)
Ģ Right: Skip forward; Scan
forward in a file (press and
hold)
Ģ Up/Down: Adjust the
volume
0
Switch to the full screen view
(video file only)27
quick start guide
Customise your device
Get more from your device by customising it to
match your preferences.
Adjust the volume of the key tones
On the Home screen, press the Volume key up
or down to adjust the key tone volume.
Change your ringtone
1. On the Home screen, press ?
Settings ? Sounds ? Ringtone.
2. Scroll left or right to a ringtone.
3. Press .
Set your device profile
Activate a profile
1. On the Home screen, press ?
Settings ? Profiles.
2. Scroll to a profile and press .
Personalise a profile
1. On the Home screen, press ?
Settings ? Profiles.
2. Scroll to a profile and press ?
Edit.
3. Change the settings as desired.
4. When you are finished personalising the
profile, press .
To quickly change profiles, press [ ] and
select a different profile.28
quick start guide
Select a theme for the display or
wallpaper
1. On the Home screen, press ?
Settings ? Display ? Home Screen.
2. Scroll left or right to change the theme in
Home screen layout.
3. Scroll down to Background image.
4. Scroll left or right to your background
image.
5. When you are finished, press .
Download applications from the
web
You can find, purchase, and download
Windows Mobile applications directly from the
online store and post your reviews about
applications. You can also find links to access
other web pages.
On the Home screen, press ?
? Marketplace.29
communication
Your device allows you to send and receive many
types of calls and messages over cellular networks
and the internet.
Calls
Learn to use advanced call functions.
Call an international number
1. On the Home screen, press and hold [0] to
insert the + character.
2. Enter the complete number you want to dial
(country code, area code, and phone
number), and then press [ ] to dial.
Call a contact from Contacts
You can call numbers directly from Contacts
using stored contacts. X p. 23
1. On the Home screen, press ?
Contacts.
2. Scroll to the number you want to dial and
press [ ] to dial.30
communication
Make a call from Call History
1. On the Home screen, press ?
Applications ? Call History.
2. Scroll up or down to a number or name and
press [ ] to dial.
Forward calls
1. On the Home screen, press ?
Settings ? Phone ? Voice Calls ? Call
Forwarding.
2. Select a forwarding option and enter a
phone number.
Bar (block) calls
1. On the Home screen, press ?
Settings ? Phone ? Voice Calls ? Call
Barring.
2. Select a call type ? a barring option.
Messaging
Learn to use messaging functions. For
instructions on entering text, see the quick start
guide.
Send a multimedia message
1. On the Home screen, press ?
Messaging ? SMS/MMS.
2. Press ? New.
3. Enter a destination number or press
? Add Recipients to select a
contact.
4. Press ? Switch to MMS.
5. Scroll down and enter your message text.
6. Press ? Add and add an item.
7. Press to send the message.31
communication
Create an email account
Before you can send or receive email
messages, you must create an email account.
1. On the Home screen, press ?
Messaging ? Setup Email.
To easily create an email account, press
? Email Wizard.
2. Enter your email address and password,
and press .
3. To manually set up email account, clear the
check box next to Try to get e-mail
settings automatically from the Internet.
4. Press .
5. Select the predefined email provider and
press .
6. Enter your name and account name, and
press .
7. Enter the incoming mail server and select
the account type, and press .
8. Enter a user name and password, and
press .
9. Enter the outgoing mail server and press
.
10. Set how often your device connects to the
server and checks for incoming email
messages in Automatic Send/Receive
(if necessary).
11. Press .
Send an email message
1. On the Home screen, press ?
Messaging.
2. Select the name of an email account.
3. Press ? New.
4. Enter an email address in the To field or
press ? Add Recipient to select
a contact.
5. Scroll down and enter a message subject.32
communication
6. Scroll down and enter your message text.
7. Press ? Insert and attach a file
(if necessary).
8. Press to send the message.
Retrieve email from an email server
Before you retrieve email from an internet
service provider or VPN connection, you must
create an email account.
To retrieve messages from your Outlook
account, see "Synchronise your data." X p. 65
1. On the Home screen, press ?
Messaging.
2. Select the name of an email account.
3. Press ? Send/Receive.
View messages
You can access message folders for your text
and multimedia messages in one location, and
for email messages.
To view messages,
1. On the Home screen, press ?
Messaging.
2. Select SMS/MMS or the name of an email
account.
The Inbox for the account you selected will
open.
3. To download the complete contents of
email, select an email from the list or press
? Download Message.
View or save email attachments
Email attachments may contain viruses that
can damage your device. To protect your
device, open attachments only if you trust
the sender.33
communication
To view an attachment,
1. From an open email, scroll to the
attachment and press the Confirm key.
2. Press the Confirm key ? to open
the attachment.
The attachment opens with the
corresponding application.
To save an attachment,
1. From an open email, scroll to the
attachment and press the Confirm key to
download.
2. Press the Confirm key ? to open
the attachment.
3. Press ? Save As...
4. Set a file name and memory location and
press .34
media
Learn to use Camera, Contents Manager,
Photo Slides, FM Radio, Streaming Player,
Audio Notes, and Voice Notes.
Camera
Learn how to capture photos in various modes
and customise camera settings.
Capture a series of photos
1. Press and hold the Camera key to turn on
the camera.
2. Press ? Shooting Mode ? Multi
Shot.
3. Make any necessary adjustments.
4. Press and hold the Confirm key or Camera
key to take a series of photos.
5. Press to save the photo.35
media
Capture photos with decorative
frames
1. Press and hold the Camera key to turn on
the camera.
2. Press ? Shooting Mode ?
Frame Shot.
3. Press ? .
4. Select a frame and press the Confirm key.
5. Make any necessary adjustments.
6. Press the Confirm key or Camera key to
take a photo with the frame.
7. Press to save the photo.
Capture divided photos
1. Press and hold the Camera key to turn on
the camera.
2. Press ? Shooting Mode ?
Mosaic Shot.
3. Press ? .
4. Select an image layout and press the
Confirm key.
5. Make any necessary adjustments.
6. Press the Confirm key or Camera key to
take the divided photos for each segment.
7. Press to save the photo.
Capture photos in Smile shot mode
1. Press and hold the Camera key to turn on
the camera.
2. Press ? Shooting Mode ?
Smile Shot.
3. Make any necessary adjustments.
4. Press the Confirm key or Camera key.
5. Aim the camera lens at your subject.36
media
Your device recognises people in an image
and detects their smiles. When the subject
smiles, the device automatically takes a
photo.
6. Press to save the photo.
Capture photos by using options
preset for various scenes
1. Press and hold the Camera key to turn on
the camera.
2. Press ? Scene ? a scene.
3. Make any necessary adjustments.
4. Press the Confirm key or Camera key to
take a photo.
5. Press to save the photo.
Use camera options
Before capturing a photo, press to
access the following options:
Option Function
Shooting
Mode
Change the shooting mode
Scene Change the scene mode
Resolution Change the resolution option
White
Balance
Adjust the colour balance
ISO
Adjust the sensitivity of the
camera imaging sensor
Metering Select a type of exposure metre
Effect Apply a special effect37
media
Before capturing a video, press to
access the following options:
Customise camera settings
Before capturing a photo, press ?
Settings ? Photo or Setup to access the
following options:
Before capturing a video, press ?
Settings ? Video or Setup to access the
following options:
Option Function
Recording
Mode
Change the recording mode
Resolution Change the resolution option
White
Balance
Adjust the colour balance
Effect Apply a special effect
Setting Function
Image Quality
Adjust the quality of your
images
Shutter sound
Select a sound to
accompany the shutter
action
Review screen
Set the camera to switch to
the review screen after
capturing photos
Zoom sound
Turn the zoom sound on or
off
Brightness
sound
Turn the brightness sound on
or off
Storage
Select a memory location to
store new images
Setting Function
Video Quality
Adjust the quality of your video
clips
Recording
sound
Select a sound to accompany
the shutter action
Setting Function38
media
Contents Manager
With Contents Manager, you can view and
access all the files and folders on your device.
View a photo
1. On the Home screen, press ?
Contents Manager ? My Pictures.
2. Scroll to a photo thumbnail and press the
Confirm key to open it.
While viewing photos, you can perform the
following functions:
Ģ To scroll through your photos, scroll left or
right.
Ģ To zoom, press the Confirm key and then
press the left softkey or right softkey. To exit
the zoom screen, press [ ].
Ģ To edit the picture, press ? Edit
Image.
Audio
recording
Turn the audio on or off
Encoding
format
Select an encoding format of
your video clips
Review
screen
Set the camera to switch to the
review screen after capturing
videos
Zoom sound Turn the zoom sound on or off
Brightness
sound
Turn the brightness sound on
or off
Storage
Select a memory location to
store new video clips
Setting Function39
media
Ģ To set a photo as a background or caller ID
image, press ? Set as ? an
option.
Ģ To view your photos as a slideshow, press
? Play Slide Show.
Play a video
1. On the Home screen, press ?
Contents Manager ? My Videos.
2. Scroll to a video thumbnail and press the
Confirm key to open it.
Open documents
1. On the Home screen, press ?
Contents Manager.
2. Locate and open the folder where the
document is stored.
3. Scroll to the document and press the
Confirm key to open it.
Send a file
1. On the Home screen, press ?
Contents Manager.
2. Locate and open the folder where the file is
stored.
3. Select a file.
4. Press ? Send ? a sending
option.
Ģ To send as a multimedia message,
select via Multimedia Msg. See "Send
a multimedia message." X p. 30
Ģ To send as an email message, select via
e-mail. See "Send an email message."
X p. 31
Ģ To send via the Bluetooth wireless
feature, select via Bluetooth. See
"Bluetooth." X p. 6140
media
Photo Slides
Photo Slides allows you to create photo
albums, edit photos, and view slideshows with
background music.
Create a photo album
1. On the Home screen, press ?
Applications ? Photo Slides.
2. Press ? Create album.
3. Enter an album name, set the creation date,
and select OK.
4. Locate a photo in another album or folder
and press ? Edit ? Copy.
5. Select the name of your new album or
folder and then press ? Edit ?
Paste.
Edit photos
1. On the Home screen, press ?
Applications ? Photo Slides.
2. Select a thumbnail to open the photo.
3. Press ? an editing option (Rotate
Left, Rotate Right, or Effect).
4. Select an effect option (if necessary).
5. To save the photo with your changes, press
[ ].
View slideshows with background
music
1. On the Home screen, press ?
Applications ? Photo Slides.
2. Select a photo.
3. Press ? Slide Show.41
media
4. During a slideshow, press the Confirm key
to display the following controls:
FM Radio
You can listen to your favourite stations with the
FM radio.
Listen to the FM radio
1. Plug a headset into the multifunction jack.
2. On the Home screen, press ? FM
Radio.
3. Press to start automatic tuning.
The radio scans and saves available
stations automatically.
4. When automatic tuning is finished, press
.
5. Scroll left or right to scan through available
radio stations.
Icon Function
Pause the slideshow
Stop the slideshow
Play the slideshow
Skip to the previous photo
Skip to the next photo
Rotate the photo
Change the background music
Quit the slideshow
The first time you turn on the FM radio, you
will be prompted to start automatic tuning.42
media
6. Control the FM radio using the following
keys:
Store radio stations by automatic
tuning
1. From the radio screen, press the Confirm
key to start the FM radio.
2. Press ? Channel list.
3. Press ? .
The radio scans and saves available
stations automatically.
4. Press .
You can access the radio station list by
pressing ? Channel list from the
radio screen.
Set up your favourite list
1. From the radio screen, press the Confirm
key to start the FM radio.
2. Scroll left or right to tune a radio station you
want.
3. Press to save the radio
station to the Favourite list.
4. Press to confirm.
5. To add more radio stations, repeat steps
2-4 above.
Key Function
Volume Adjust the volume
Confirm Turn the FM radio on or off
Navigation
Ģ Left/Right: Tune a radio
station
Ģ Up/Down: Adjust the
volume43
media
Streaming Player
You can play streaming files on the web.
1. On the Home screen, press ?
Applications ? Streaming Player.
2. Press .
3. Enter a URL address of the streaming file
and press .
You can select a URL address on the Recent
history list.
Audio Notes
You can record sounds from various sources
and save them as mp3 files.
Record an audio note
1. On the Home screen, press ?
Organizer ? Audio Notes.
2. Press .
3. Press the Confirm key to begin the
recording.
4. When you are finished recording, press
.
The audio note is automatically saved.
Play an audio note
1. On the Home screen, press ?
Organizer ? Audio Notes.
2. Scroll to an audio note and press the
Confirm key.
Playback begins automatically.
3. Control playback using the following keys:
Key Function
Volume Adjust the volume
Confirm Pause or resume playback
Navigation
Ģ Left: Skip backward
Ģ Right: Skip forward
Stop playback44
media
Voice Notes
You can use Voice Notes to record and play
back voice memos and sound clips.
Record a voice clip
1. On the Home screen, press ?
Applications ? Voice Notes.
2. Press to begin the recording.
3. When you are finished recording, press
.
The voice clip is automatically saved.
Play a voice clip
1. On the Home screen, press ?
Applications ? Voice Notes.
2. Scroll to a voice clip and press the Confirm
key.
The playback begins automatically.45
personal
productivity
Learn to use Contacts, Calendar, Anniversary,
Office Mobile, Adobe Reader LE, Tasks,
and Smart Reader.
Contacts
Learn to use contact cards to store personal
information, such as names, phone numbers,
and addresses.
Copy contact cards
You can copy your contact cards from your
device to your SIM card and vice versa. When
you copy an Outlook contact to your SIM card,
you can only store the contactÆs name and
phone number.
1. On the Home screen, press ?
Contacts.
2. To copy a contact card, press ?
Copy Contact ? To SIM or To Contacts.
To retain all the contact information, synchronise
your Outlook contacts with a PC (see
"Synchronise your data" X p. 65).46
personal productivity
Assign a speed dial number to a
contact card
1. On the Home screen, press ?
Contacts.
2. Scroll to a contact card and press the
Confirm key.
3. Scroll to a phone number and press
? Add to Speed Dial.
4. Scroll left or right to set a speed dial
number in the keypad assignment field (if
necessary).
5. When you are finished, press .
Assign an image or a ringtone to a
contact card
1. On the Home screen, press ?
Contacts.
2. Scroll to a contact card.
3. Press ? Edit.
4. To assign a ringtone, scroll to Custom ring
tone and scroll left or right to a ringtone.
5. To assign an image, scroll to Picture and
scroll right to an image.
6. When you are finished, press .
Calendar
Use Calendar to keep track of appointments,
birthdays, or other events.
Create a calendar event
1. On the Home screen, press ?
Calendar.
2. Press ? New Appointment.
3. Complete the fields and adjust the settings
for your event.
4. When you are finished, press .47
personal productivity
Change the calendar view
1. On the Home screen, press ?
Calendar.
2. Press the left softkey to change the
calender view.
Stop an event alarm
When the alarm sound for a calendar event you
set previously, press .
Anniversary
With Anniversary, you can manage your
anniversaries and special days.
Schedule an anniversary
1. Press ? Organizer ?
Anniversary.
2. Press .
3. Set the anniversary details.
4. When you are finished, press .
Stop an anniversary alarm
When the alarm sound for the anniversary you
set previously, press .
Office Mobile
With Office Mobile, you can open and edit
Word, Excel, and PowerPoint files on your
device. Your device supports files created with
Office 97 and newer versions.
Open and edit an Excel workbook
To open and view an Excel workbook,
1. On the Home screen, press ?
Applications ? ?Office Mobile
? Excel Mobile.
2. Locate an Excel file and select the file name
to open it.48
personal productivity
3. To zoom in or out on part of a document,
press any softkey ? ? Zoom ? a
zoom option.
4. To close the workbook, press ?
Close File.
To edit an Excel workbook,
1. On the Home screen, press ?
Applications ? ? Office Mobile
? Excel Mobile.
2. Locate an Excel file and select the file name
to open it.
3. Press any softkey ? ? Edit.
4. Scroll to a cell and press the Confirm key to
select it.
5. Enter values or text and press .
6. Repeat steps 4-5 as necessary.
7. To save the workbook, press ?
File ? Save As...
8. Enter a file name and select the memory
location and press .
Open and edit a Word document
To open and view a Word document,
1. On the Home screen, press ?
Applications ? ? Office Mobile
? Word Mobile.
2. Locate a Word file and select the file name
to open it.
3. To zoom in or out on part of a document,
press ? a zoom option.
4. To close the document, press ?
Close File.49
personal productivity
To edit a Word document,
1. On the Home screen, press ?
Applications ? ? Office Mobile
? Word Mobile.
2. Locate a Word file and select the file name
to open it.
3. Press ? Edit.
4. Edit your document.
5. To save the document, press ?
File ? Save As...
6. Enter a file name and select the memory
location and press .
Open and view a PowerPoint
slideshow
1. On the Home screen, press ?
Applications ? ? Office Mobile
? PowerPoint Mobile.
2. Locate a PowerPoint file and select the file
name to open it.
3. To begin the slideshow, press any softkey
? ? Custom Show.
4. To end the slideshow, press .
Create and edit a note
1. On the Home screen, press ?
Applications ? ? Office Mobile
? OneNote Mobile.
2. Press to create a new note.
3. Create your note.
4. To change the format, press ?
Format ? a type.
To clear all formatting, press ?
Format ? Clear All.
5. To add pictures or voice memos, press
? Take Picture, Insert Picture,
or Insert Recording.
6. To save the note, press .50
personal productivity
Adobe« Reader LE
With Adobe Reader LE, you can open and view
PDF documents.
1. On the Home screen, press ?
Applications ? Adobe Reader LE.
2. Locate a PDF file and select the file name to
open it.
3. To zoom in or out on part of a document,
press ? Zoom ? a zoom option.
To skip to another page, press ?
Go To ? an option.
Tasks
With Tasks, you can create to-do lists and
reminders.
Create a task
1. On the Home screen, press ?
Organizer ? Tasks.
2. Press ? New Task.
3. Enter details for the task.
4. When you are finished, press .
Mark a task as completed
When you have completed a task, return to the
Tasks screen, scroll to the task name, and
press . Once you have marked a
task completed, you will no longer receive any
scheduled reminders for that task.
To set a reminder for the task, select the due
field and set a due date. Select the check
box under Reminder and specify the date
and time of the reminder.51
personal productivity
Smart Reader
Smart reader allows you to capture information
from a business card or document and save it
as a new contact or convert it to an editable
note file. You can also capture words and
translate them to another language.
Recognise a business card
1. On the Home screen, press ?
Organizer ? Smart Reader.
2. Position the device over the business card,
so that the frame on the viewfinder aligns
with the edges of the business card.
See Tips for recognising business cards.
3. Press the Confirm key.
Your device recognises the business card
and converts it to contact card format.
4. Press to save the
contact card.
5. Press .
Tips for recognising business cards
Ģ Hold the device steady while capturing a
photo of the business card.
Ģ Be careful not to allow any shadows to fall
on the business card.
Ģ Place the business card on level, evenly lit
surface when capturing information from it.
This feature may be unavailable depending
on your region or service provider.
As you align the frame in the viewfinder with
the edges of the business card, they will
change to green. If you can align all four
edges of the frame at once, your device will
automatically capture the image.52
personal productivity
Capture a document
1. On the Home screen, press ?
Organizer ? Smart Reader.
2. Press ? Mode ? Text
Recognition.
3. Position the device over the document.
4. Press the Confirm key.
Your device recognises the document and
converts it to a note file.
5. Press to save the note.
6. Press .53
web
Learn to use Internet Explorer, Messenger, RSS
Reader, Podcast, Communities, Fring
TM,
Microsoft My Phone, and Search Widget.
Internet Explorer
Use Internet Explorer to browse web pages and
bookmark your favourite web pages.
Browse a web page
1. On the Home screen, press ?
Internet Explorer.
2. Access a web page:
Ģ Press ? Go to Web Address
to enter a web address and find a
specific web page.
Ģ Press ? Favourites and select
a bookmark.
Ģ Press ? History to select a
web address from the history list.
To close the web connection. Press and hold
[ ], scroll to Internet Explorer, and press
.54
web
Add a bookmark
1. On the Home screen, press ?
Internet Explorer.
2. Access a web page you want and press
? Add to Favourites.
3. Enter the bookmark name and address (if
necessary).
4. Change the folder under which you want to
add the bookmark (if necessary).
5. Press .
Change browser settings
From the browser, press ? Tools ?
Options:
Ģ Home Page: set a WAP address for
homepage
Ģ Browsing History: view information about
the memory currently in use for temporary
files, cookies, and history
Ģ Privacy and Security: set a degree of the
security
Ģ Languages: set your preferred languages to
display
Ģ Connections: configure connection settings
Ģ Other: set sound and display settings for the
browser
Messenger
With Windows Live Messenger, you can remain
available to other users and stay up-to-date
with your email without a constant connection
to the internet. When a new message arrives or
you want to access internet services, the
connection will be restored.55
web
Set up Messenger and sign in
1. On the Home screen, press ?
? Messenger.
2. Scroll left or right to select your login status.
3. Press .
Chat with Messenger
1. From the messenger screen, locate and
select a contactÆs name, and then press
.
2. Enter a message in the text field at the
bottom of the screen, and then press
.
3. While chatting, you can perform the
following actions:
Ģ Insert emoticons: press ? Add
emoticon
Ģ Invite a contact to chat: press
? Options ? Add participant
Ģ Transfer a file: press ? Send
? a file type ? a file
Ģ Record and send a voice clip: select
Voice clip, record your voice clip, and
then press
Ģ Switch between the contact list and
chat: scroll left or right
To end the chat, press ? End
conversation.
RSS Reader
Learn to use RSS reader to get the latest news
and information from your favourite websites.
Create feeds
1. On the Home screen, press ?
Applications ? RSS Reader.
2. Press ? Edit ? New folder (if
necessary).56
web
3. Press ? Edit ? New feed.
4. Enter the address of a RSS feed and select
the folder under which you want to add the
RSS feed and press .
Import feeds
You can add feeds by importing OPML files.
1. On the Home screen, press ?
Applications ? RSS Reader.
2. Press ? OPML ? Import ?
Select OPML file or Enter OPML URL.
3. Locate an OPML file or enter the address of
an OPML URL.
Read RSS feeds
1. On the Home screen, press ?
Applications ? RSS Reader.
2. Scroll to a feed and press to get
the latest contents.
3. When the update is finished, press
.
4. Press the Confirm key to select an updated
feed.
Find new feeds
1. On the Home screen, press ?
Applications ? RSS Reader.
2. Press ? Feed search.
3. Enter a keyword and press .
Your device searches for related feeds on
the internet and displays the results.
4. Scroll to the feed and press to add
it to the RSS feed list.57
web
Podcast
Use Podcast to download audio or video files
from a web and play them on your device.
Subscribe to a podcast
1. On the Home screen, press ?
Applications ? Podcast ? Podcasts.
2. Press ? Subscribe to Podcast.
3. Enter a web address (URL) and press
? .
4. Follow the on-screen instructions to
complete the setup.
Search for a podcast
1. On the Home screen, press ?
Applications ? Podcast ? Podcasts.
2. Press ? Search Podcast.
3. Enter a keyword and press .
Your device searches for related reports on
the internet and displays the results.
4. Scroll to the report and press to
add it to the podcast list.
Download and play a podcast
1. On the Home screen, press ?
Applications ? Podcast ? Podcasts.
2. Scroll to a podcast and press to
download it.
The podcast automatically plays in
Windows Media Player.58
web
Communities
With Communities, you can upload photos and
videos to your favourite websites and blogs and
get the latest updates from them.
Set your favourite destination list
1. On the Home screen, press ?
Applications ? Communities.
2. Press to confirm that you agree
to general disclaimer.
3. Press to set your favourite
destination list (if necessary).
4. Select the websites or blogs you want to
add and press .
If you pressed ? Update lists,
new destination sites are added to the list
automatically.
Upload a file
1. On the Home screen, press ?
Applications ? Communities.
2. Scroll to a website and blog.
3. Press .
4. Enter your use name and password (if
necessary).
5. Press ? Add file ? a photo or
video.
6. Enter the title for the photo or video and
press .
This is available only if supported by your
service provider or region.59
web
FringÖ
Fring is a mobile internet and community
service that enables you to chat with friends
who use other types of messengers, make
affordable local and international calls through
the internet, and transfer media files. With fring,
you can experience PC-like benefits on your
mobile device. For more information, contact
your service provider.
On the Home screen, press ?
? Fring.
Microsoft My Phone
You can syncronise the device with your
Microsoft account.
1. On the Home screen, press